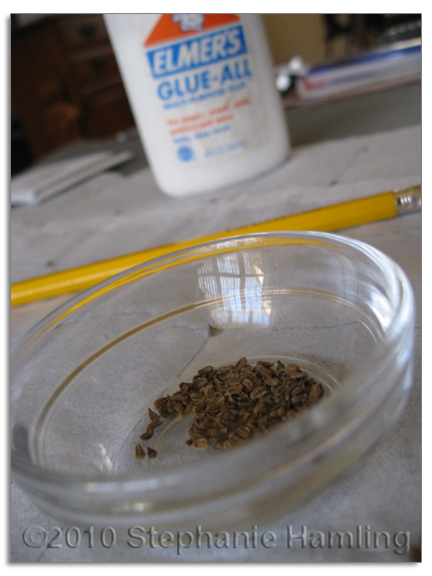
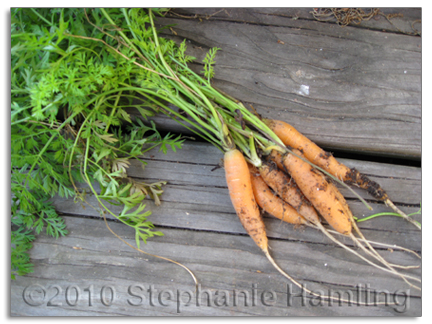
 I get the itch to start gardening long before Mother Nature smiles kindly on such endeavors. Winter evenings are spent leafing through seed catalogs, drawing up plans, constructing newspaper pots, and creating seed tapes. I started making seed tapes the same spring I started planting carrots. Mom and Dad never planted carrots, and, having no experience with them, they intimidated me. Anything I could do to assure a good outcome from the root crop, I did. I dug deeply and sifted the soil, removing rocks that could interrupt growth. I read over and over again how important spacing was and realized the difficulty that might be had with such small seeds. Tapes seemed like a great idea, but commercial versions had two big problems. Commercial tapes are made for row gardening, and I garden in squares. Also, purchase tapes will have several seeds at each interval, and I hate to thin seedlings. So, as I like to do with many things, I decided to make my own tapes to suit me.
I start with cheap paper towels, and separate them down to one ply. You want them to be thin so they will break down quickly. I like one foot squares. If needed you can glue the towels together to get the proper size. The less ridiculous among you can probably free style the spacing; I cannot make myself do it. I pull out my trusty measuring/cutting mat that has seen me through more art projects than I can count. This mat coupled with a long ruler and writing instrument of choice help me create a spacing grid on each towel. Grid size is determined by what you are planting. My mokum carrots call for a final spacing (this would be the spacing you would end up AFTER you thinned, if you were thinning) of two inches. So, starting one inch from the edge of the square, I draw out a grid in which the lines are two inches apart. Why start one inch in instead of two? If you lay two grids together you will see why. The two-inch grid is maintained from one tape to the next.
 To finish up the tapes, I set up an area with a small bowl of water, a bowl of seeds, a bottle of school glue, and a pencil. Dot a small amount of glue at each grid intersection. Dampen your pencil tip and use it to pick up one seed. Place seed onto glue dot. Repeat the process until you finish the sheet. It is tedious but goes quickly in front of the TV or with NPR on in the background. Let the sheet dry, moving it occasionally to be sure it doesn’t stick to the table. Once the glue is completely dry, slip the sheet into an air tight container until planting day.
Level and sprinkle planting area well before laying down seed tape. Spread out the paper towel over the planting area and wet it down. Apply a layer of fine soil over the top. Water once more. I cover my plantings with a salvaged window. This helps keep them moist and protects them from curious birds and other wildlife. One curious nibble can upset your entire planting. Continue to water well, and you should soon have a nice even square of sprouts.


6 comments
Comments feed for this article
March 10, 2010 at 8:09 pm
Julie
This is a great post! Something I never thought about doing before. Can you recommend other seeds that this works well with? I’m doing a garden journal on my blog this year too!
March 10, 2010 at 8:22 pm
Stephanie
I’ve done this with carrots, radishes, arugula, and lettuce. I don’t recommend it with the greens. It didn’t hurt, but it just wasn’t really worth in. Radishes it works well with. I’ve even done radishes and carrots on the same sheet since radishes grow off so quickly. I’d only do that if really pressed for space. You could do it with about anything, but root crops with small seeds and close spacing seem to benefit the most. My first carrots are up as of yesterday, so I’m excited.
September 11, 2012 at 12:24 am
emanda
i would assume that any small seeded plant could do this too radishes beets turnips rutabagas etc i know i will try in 2013
March 13, 2010 at 8:44 pm
Julie M.
I had so much fun doing up my carrot sheets yesterday! It’s been too long since I bellied up to a newspaper placemat and a bottle of Elmer’s.
March 14, 2010 at 1:20 pm
Stephanie
Glad you had fun. I’m planning on making more this evening as I took my stash to Mom. I’d say at least 70% of my carrots are up with new shoots each day.
February 17, 2011 at 10:35 pm
In the Garden: 2011 Journal « proactive bridesmaid
[…] cabbage, lettuce and Brussel sprouts have been hanging out here since last fall. Today I planted carrots, radishes, and Swiss chard, all […]